Ubuntu18.04配置 ROS2 dashing+ gazebo9 + Turtlebot3
# 预备工作
## 1.换源
```cpp
# 首先备份源列表
$ sudo cp /etc/apt/sources.list /etc/apt/sources.list_backup
# 打开sources.list文件
$ sudo gedit /etc/apt/sources.list
# 在文件最前面添加阿里云镜像源
deb http://mirrors.aliyun.com/ubuntu/ bionic main restricted universe multiverse
deb http://mirrors.aliyun.com/ubuntu/ bionic-security main restricted universe multiverse
deb http://mirrors.aliyun.com/ubuntu/ bionic-updates main restricted universe multiverse
deb http://mirrors.aliyun.com/ubuntu/ bionic-proposed main restricted universe multiverse
deb http://mirrors.aliyun.com/ubuntu/ bionic-backports main restricted universe multiverse
deb-src http://mirrors.aliyun.com/ubuntu/ bionic main restricted universe multiverse
deb-src http://mirrors.aliyun.com/ubuntu/ bionic-security main restricted universe multiverse
deb-src http://mirrors.aliyun.com/ubuntu/ bionic-updates main restricted universe multiverse
deb-src http://mirrors.aliyun.com/ubuntu/ bionic-proposed main restricted universe multiverse
deb-src http://mirrors.aliyun.com/ubuntu/ bionic-backports main restricted universe multiverse
# 刷新列表
$ sudo apt-get update
$ sudo apt-get upgrade
$ sudo apt-get install build-essential
```
## 2.配置Hosts
输入 `sudo vim /etc/hosts`,在最后添加
```cpp
$ 199.232.69.194 github.global.ssl.fastly.net
$ 185.199.111.133 raw.githubusercontent.com
```
注意:不要添加 `140.82.112.3 github.com` ,会影响后续安装
# 一、安装ros2 dashing
## 1. 设置语言环境
(1)设置环境[检查UTF-8]
```cpp
$ sudo locale-gen en_US en_US.UTF-8
$ sudo update-locale LC_ALL=en_US.UTF-8 LANG=en_US.UTF-8
$ export LANG=en_US.UTF-8
```
## 2.添加密钥
```cpp
$ sudo apt update && sudo apt install curl gnupg2 lsb-release
$ curl http://repo.ros2.org/repos.key | sudo apt-key add -
```
## 3.将存储库添加到源列表
```cpp
$ sudo sh -c 'echo "deb [arch=amd64,arm64] http://packages.ros.org/ros2/ubuntu `lsb_release -cs` main" > /etc/apt/sources.list.d/ros2-latest.list'
```
## 4.安装ROS2包
```cpp
$ sudo apt update && sudo apt install ros-dashing-desktop
```
## 5.安装argcomplete
```cpp
$ sudo apt install python3-argcomplete
```
## 6.Sourcing the setup script in .bashrc
```cpp
$ echo "source /opt/ros/dashing/setup.bash" >> ~/.bashrc
```
## 7.安装额外的中间件
如果我的记忆没有错乱,这个时间会挺久
```cpp
$ sudo apt update
$ sudo apt install ros-dashing-rmw-opensplice-cpp # for OpenSplice
$ sudo apt install ros-dashing-rmw-connext-cpp # for RTI Connext (requires license agreement)
```
## 8.测试
```cpp
# 新终端,运行talker例子(注意:新终端)
$ ros2 run demo_nodes_cpp talker
# 新终端,运行listener例子
$ ros2 run demo_nodes_py listener
```
出现以下内容,则说明ROS2安装成功

# 二、安装Gazebo9
## 1.安装ROS2依赖包
```cpp
# Install Colcon
$ sudo apt install python3-colcon-common-extensions
# Install Cartographer dependencies
$ sudo apt install -y \
google-mock \
libceres-dev \
liblua5.3-dev \
libboost-dev \
libboost-iostreams-dev \
libprotobuf-dev \
protobuf-compiler \
libcairo2-dev \
libpcl-dev \
python3-sphinx
```
## 2.update
```cpp
$ sudo apt-get update
```
## 3.安装gazebo
```cpp
$ sudo apt install ros-dashing-gazebo-ros-pkgs
```
## 4.在虚拟机中,需要关闭硬件加速
```cpp
$ echo " export SVGA_VGPU10=0" >> ~/.bashrc
$ source ~/.bashrc
```
## 5.测试
```cpp
$ gazebo --verbose /opt/ros/dashing/share/gazebo_plugins/worlds/gazebo_ros_diff_drive_demo.world
```
## 6.继续安装ROS2依赖包
```cpp
# Install Cartographer
$ sudo apt install ros-dashing-cartographer
$ sudo apt install ros-dashing-cartographer-ros
# Install Navigation2
$ sudo apt install ros-dashing-navigation2
$ sudo apt install ros-dashing-nav2-bringup
# Install vcstool
$ sudo apt install python3-vcstool
```
对了,检查一下`home`文件夹下,这个时候应该有了一个`.gazebo`文件
# 三、安装turtlebot3
## 1.创建工作空间
```cpp
$ mkdir -p ~/turtlebot3_ws/src
$ cd ~/turtlebot3_ws
```
## 2.下载
(注意:一定要选择dashing-devel的分支!!!乖乖听话,否则,会变得不幸)
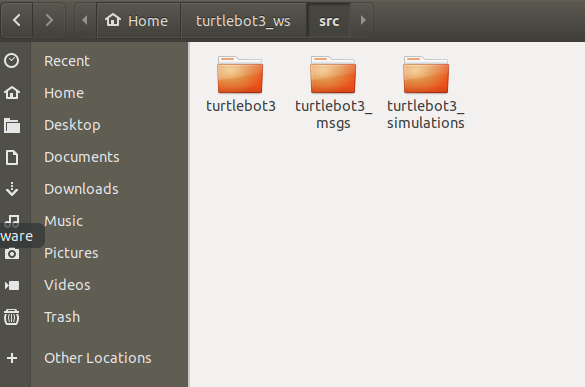
下载以下三个项目,放在`~/turtlebot3_ws/src`下边
```cpp
$ https://github.com/ROBOTIS-GIT/turtlebot3/tree/dashing-devel
$ https://github.com/ROBOTIS-GIT/turtlebot3_msgs/tree/dashing-devel
$ https://github.com/ROBOTIS-GIT/turtlebot3_simulations/tree/dashing-devel
$ (如需dqn,下载)git clone -b ros2 https://github.com/ROBOTIS-GIT/turtlebot3_machine_learning.git
```

## 3.编译
这个时候,你应该站在`~/tb3_ws`
```cpp
$ colcon build --symlink-install
```
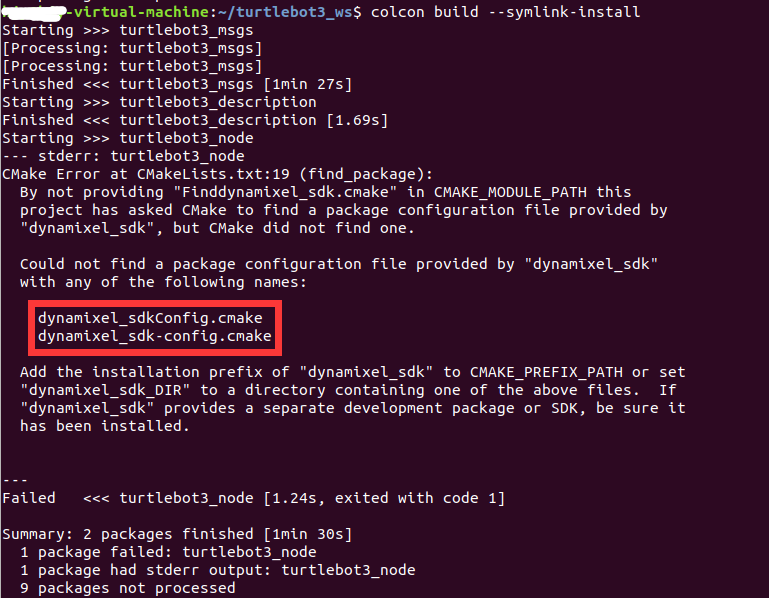
又是泪了,如果出现类似以下错误

缺啥install啥,比如我这缺`dynamixel-sdk`,就执行以下命令,然后重新`colcon build --symlink-install`
```cpp
$ sudo apt-get install ros-dashing-dynamixel-sdk
```
## 4.添加环境变量
```cpp
$ echo 'source ~/tb3_ws/install/setup.bash' >> ~/.bashrc
$ echo 'export ROS_DOMAIN_ID=30 #TURTLEBOT3' >> ~/.bashrc
$ source ~/.bashrc
$ echo 'export TURTLEBOT3_MODEL=burger' >> ~/.bashrc
```
# 四、启动gazebo不同环境
## 1. 下载gazebo的模型,加速运行gazebo
```cpp
$ cd ~/.gazebo/
# 下边两句建议用第二句,会更快
$ git clone https://github.com/osrf/gazebo_models models
$ git clone https://hub.fastgit.org/osrf/gazebo_models models
```
## 2.需要删除.git目录,要不运行会出错
```cpp
$ rm -rf models/.git
```
## 3.设置GAZEBO_MODEL_PATH变量, 指定机器人类型为burger
```cpp
$ echo 'export GAZEBO_MODEL_PATH=$GAZEBO_MODEL_PATH:~/tb3_ws/src/turtlebot3/turtlebot3_simulations/turtlebot3_gazebo/models' >> ~/.bashrc
$ echo 'export TURTLEBOT3_MODEL=burger' >> ~/.bashrc
$ source ~/.bashrc
```
## 4.启动环境
**(1)启动Fake Node**
```cpp
$ ros2 launch turtlebot3_fake_node turtlebot3_fake_node.launch.py
```
启动后弹出rviz,并显示小车模型
打开一个新的终端,启动键盘控制(下边示例,启动键盘同理)
```cpp
$ ros2 run turtlebot3_teleop teleop_keyboard
```
**(2)启动empty地图**
新开终端,启动gezebo,并带有empty地图
```cpp
$ ros2 launch turtlebot3_gazebo empty_world.launch.py
```
**(3)启动world地图**
新开终端,启动gezebo,并带有world地图
```cpp
$ ros2 launch turtlebot3_gazebo turtlebot3_world.launch.py
```
**(4)启动house地图**
新开终端,启动gezebo,并带有house地图
```cpp
$ ros2 launch turtlebot3_gazebo turtlebot3_house.launch.py
```
参考 [linux下apt安装ROS2 Dashing](https://www.ncnynl.com/archives/201801/2253.html)
参考 [Turtlebot3-ROS2入门教程](https://www.ncnynl.com/archives/201809/2582.html)
参考 [ros2 dashing 安装gazebo](https://blog.csdn.net/weixin_42454034/article/details/102560726)
参考 [ROS2初体验之SLAM与导航仿真](https://www.guyuehome.com/5522)
参考 [ros2与turtlebot3仿真教程-启动gazebo不同环境](https://www.ncnynl.com/archives/202008/3847.html)
- 发表于 2022-05-30 18:57
- 阅读 ( 1337 )
- 分类:ROS及基础开发
